Homegrown Brew:. Imagine waking up to the scent of freshly roasted coffee, not from a large-scale coffee producer, but from your own homegrown beans. The process of cultivating, harvesting, processing, and roasting your coffee has the potential to transform your relationship with this popular beverage. In this consideration we’re delving deep into the world of coffee from the perspective of not just a consumer, but as a producer. From understanding the optimal conditions for coffee growth, to the art of discerning when to harvest, and the science of processing and drying the beans, this exploration aims to provide enlightenment. Even more so, the methods and equipment needed to roast your own coffee beans successfully at home will be unraveled, uncovering the impacts of various degrees of roasting on flavor profiles.
Cultivating and Harvesting Coffee Beans
Unleashing Your Inner Barista: A Guide to Growing and Harvesting Coffee Beans at Home
For any true coffee aficionado, there’s nothing more fulfilling and enchanting than indulging in the process of growing and harvesting coffee beans at home. It’s not just about that enticing aroma or the pleasant taste; it’s about the months of nurturing and waiting that lead up to that perfect sip of home-brewed coffee. So, let’s dive into this delightful journey of artistry and patience!
#1. Choose the Right Variety
Firstly, choose the correct variety of coffee plant that suits your home environment. Arabica is often recommended for home growers as it thrives in cooler climates and has a phenomenal flavor profile. Resist the urge to start from seeds and instead, opt for a young, ready-to-plant coffee tree from a reputable nursery.
#2. Nurture the Plant
Coffee plants relish a shady spot away from direct sunlight, along with a consistent temperature ranging from 60 – 70°F. Create a well-draining, slightly acidic planting mix combining peat moss, vermiculite, and perlite. Water them carefully; they enjoy moist (not soaking wet) soil. Remember – over-watering is more harmful than under-watering.
Feed your plants lightly with slow-release, balanced, acidic fertilizers. Maintain regular fertilization every couple of months, with a reduced frequency in winter months.
For proper growth, coffee plants require humidity. To replicate this indoor, use a pebble tray filled with water or a humidifier.
#3. Patience is the Key
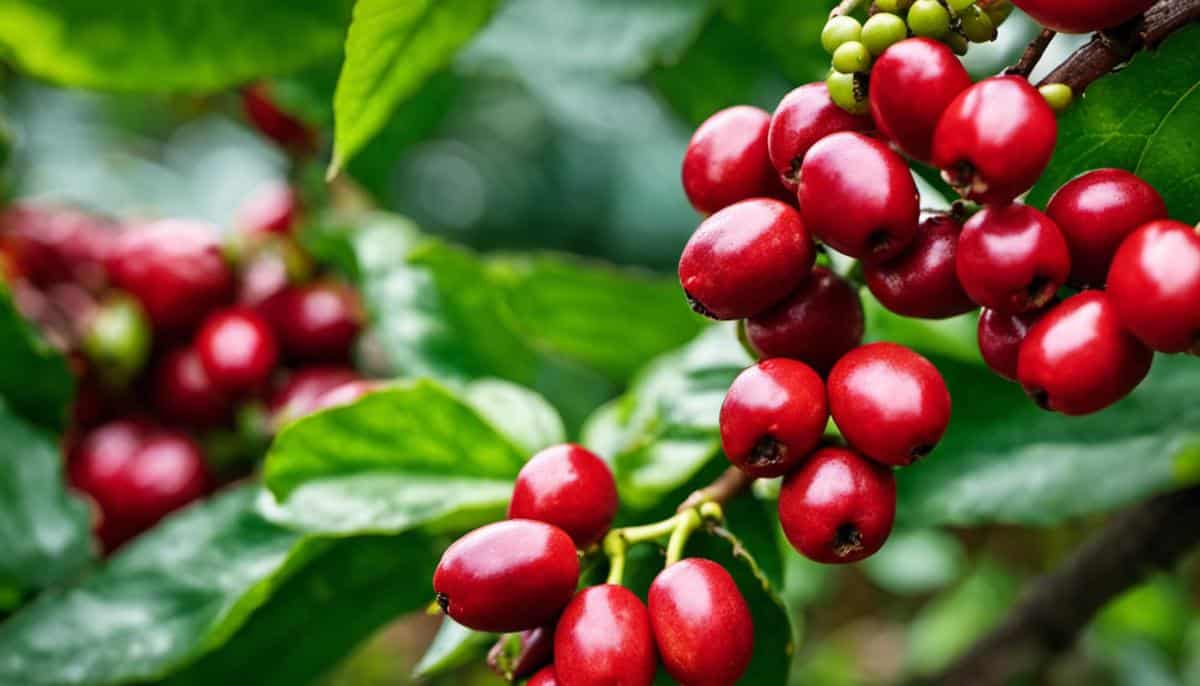
Now, the key ingredient – patience – comes into play. Coffee plants typically start flowering after two to three years. The blossoms, which mimic jasmine in their aromatic beauty, last just a few days and give way to small green cherries. These cherries mature to a deep, glossy red over several months.
#4. Harvest Time
Harvesting is signaled by the cherries’ color – bright, deep red. Picked too early, they yield green, overly acidic beans. But patience rewards with flavorful beans, ripe for roasting.
Using a gentle hand, pluck the cherries from the branch. Avoid tugging or twisting; a delicate pinch usually suffices. Remember, not all cherries ripen at once, so several passes might be necessary over a season.
#5. Process the Cherries
Inside each cherry are two coffee beans. Remove these beans from the husk using a method known as ‘wet processing’. This involves soaking the cherries in water to soften them, followed by a good squeeze to free the bean.
Flush the collected beans with water to remove any residual pulp, a process known as ‘fermentation’. Following this, spread the beans on a wire rack for drying.
#6. Roasting the Beans
After several weeks of drying, the beans are ready for roasting, which can be accomplished via an oven, a pan, or a coffee roaster. Roast the beans at around 375°F, ensuring they are regularly stirred for an even roast.
After achieving the desired roast level, transfer beans to a colander for cooling and de-chaffing, that is, removal of the flaky skin, also known as the chaff.
Seal the roasted beans in an airtight container and let them rest. This period sees the beans releasing CO2 and developing their flavors. Following 12-24 hours of rest, the beans are finally ready to be ground and brewed into your very own cup of homegrown coffee.
At last, now it’s time to savor the brilliant, complex, and lovingly crafted flavors of your homegrown coffee! Meticulously grown and harvested with care and patience, this is more than just a daily caffeine fix; it’s the fruit of labor and a testament to a passion for coffee cultivation. Enjoy the process and, most importantly, enjoy your coffee!

Processing and Drying Coffee Beans
Title: The Art of Processing and Drying Harvested Coffee Beans: A Mastery Guide
Let’s delve deeper into the world of coffee, where the excitement does not end with just selecting the perfect coffee plant and attending to its growing needs. An assurance, once you’ve successfully navigated through the intricate steps of choosing your coffee plant species, cultivating it to maturity, and finally, harvesting its bright cherries, you are ready to experience the intriguing art of processing and drying these beans.
First off, as soon as the coffee cherries have been harvested, it’s imperative to initiate the processing they need to prevent decay. There are primarily two methods to process coffee cherries:
- wet (washed) processing
- dry (natural) processing
The choice between the two often boils down to the tradition, geographical location, and conditions of each coffee farm.
Wet Processing
In the wet processing method, also known as the washed method, the cherry pulp is removed before drying. Utilizing machinery, the ripe cherries are soaked in water where any overripe cherries float to the top and are separated. Then, the soaked cherries are pressed through a screen to separate the beans from the pulp. The coffee beans, still encased in a sticky mucilage, are then fermented in water for 24 to 48 hours. This fermentation breaks down the mucilage, which is subsequently washed off, revealing the coffee bean.
On the other hand, the dry processing method, also known as the natural process, doesn’t involve any machinery or water use. Here, freshly harvested cherries are spread out in the sun to dry for a duration that can range from a few days to several weeks. The cherries must be carefully and regularly turned to ensure even drying. Once dried, a mechanical huller is used to remove the dried pulp, skin, and parchment layer of the coffee cherries, yielding the green coffee beans.
Sorting the Beans
Once the beans are hulled and sorted, the next significant step is drying. Irrespective of the processing method employed, drying requires a delicate balance of time and temperature to maintain the bean’s quality. Ideally, beans should be dried to a moisture content of about 10-12%, anything less than this could compromise the bean’s flavor. Sun-drying is the most common method where beans are spread on to large beds for anywhere between 12 to 20 days, depending on the weather conditions.
Equally noteworthy, storing these dried beans plays a vital role in ensuring they develop a complex flavor profile. Keeping them in a porous bag in a location devoid of extreme temperature fluctuations works best. After at least a month of rest, your beans are ready for the grand finale – the roasting!
Thus, processing and drying coffee beans is an exciting venture demanding immaculate attention to detail and a keen understanding of the beans at your disposal. As you perfect the skill of producing a satisfying, flavorful cup from your hard-grown coffee, every stage of the journey becomes all the more rewarding. Immerse yourself in this invigorating exploration of the world of coffee beans, where the quest for that ‘perfect brew’ enlivens the passionate hobbyist within you.

Roasting Coffee Beans at Home
Shifting gears and putting ourselves in the fast lane, let’s now get into the nitty-gritty of the best ways to roast coffee beans at home. Simply put, the heart of home roasting coffee lies in the application of heat, but there’s so much more to it, let’s get cracking!
The first consideration should always be the roasting method. For starters, the most cost-effective and straightforward method is the whirley-pop stovetop popcorn popper. This affordable device comes equipped with a consistent heat source and an agitator to ensure even roasting of the beans.
Now, let’s talk about the degree of roast, namely, light, medium, and dark. Each has its own distinct flavor profiles, so experiment a little and see which resonates with your taste buds. Remember, the amount of time you spend roasting directly impacts the degree of roast. General rule of thumb, light roasts are brighter and can really highlight those unique plant flavors. Medium roasts are more balanced and start to bring in those toasty, caramel notes. Dark roasts lean into those smoky, bittersweet flavors that are, sort of, an acquired taste.
Roasting Temperature
Roasting temperature is essential; it varies along the process and informs the roast degree. Start with a low temperature (around 200 degrees F), slowly ramping it up to about 350 degrees at the end of the first crack, and up to 450-480 degrees F if you want a dark roast.
Since we’re focusing squarely on at-home roasting, safety comes first. Always remember to wear heat-resistant gloves, keep a fire extinguisher nearby, and last but definitely not least, NEVER leave your roaster unattended. Remember, you’re dealing with high heat and combustible material.
Once you’re done roasting, cooling is imperative. Room temperature is your friend here. You could use a metal colander, shaking the beans vigorously to allow the heat to dissipate. Make sure you’re doing this outside so you don’t smoke out your home.
Now comes the pivotal part of our coffee journey – resting. In general, it is advisable to let your newly roasted beans rest for 12-24 hours. This time window allows the beans to off-gas carbon dioxide and other volatile compounds, and in turn, develop their full flavor potential.
Presentation
Finally, presentation is a key element in every hobby. How about coming up with some funky, homemade labels for your coffee bean jars? Replace ‘best before’ with ‘best enjoyed before,’ emphasizing the fact that coffee is a pleasure, not just a product.
Roasting coffee beans at home is a magical hobby that opens up the avenue of experimentation, customization and provides a great sense of satisfaction. Just remember the golden rule; there is no right or wrong in the world of coffee roasting as long as you savor every sip. Expect a learning curve, but trust me, it’s worth the ride!
Remember, the world of coffee roasting never ceases to evolve. So stay open-minded, keep experimenting, and continue the quest for the perfect cup of joe. After all, each bean holds a different flavor journey; that’s the beauty of it! Dive in, folks – the coffee’s just fine.

Smiling with satisfaction as you consume your cup of homegrown, self-roasted coffee, you realize the difference not just in taste, but in personal fulfillment. The knowledge you’ve gained about planting, nurturing, harvesting, processing, and roasting coffee beans has given you greater appreciation for each sip. Mastering these processes has allowed you to produce a cup of coffee entirely tailored to your preferred intensity and flavor. By taking control over each phase of the coffee production process, from seed to cup, you’ve embarked on an empowering and aromatic journey towards a truly personal coffee experience. Take pride in the coffee you drink, as it’s not just a beverage anymore, but a testament to your newfound skills and dedication.


